Getting started with OneNote 2016
OneNote 2016 is an easily adaptable, highly customizable notetaking program that goes well beyond a paper and pen. It offers numerous ways to organize, share and protect the contents stored within.


OneNote 2016 is an organization tool at its core. While it is a note application, without an effective means to organize your thoughts, you're left with a random stream of scattered words.
Why tote a pad of paper and pen with you when you can access notes from your laptop and your phone and any web browser? Here's how you can get started with OneNote and begin your paperless journey to note management heaven.
- How is OneNote 2016 Organized?
- How to create notes in OneNote 2016
- How to add and customize pages and sections in OneNote 2016
- How to enter content into OneNote 2016
How is OneNote 2016 organized?

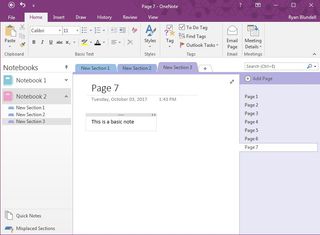
OneNote's organization works from left to right. Your list of notebooks is presented in the left pane of the program. The sections, which contain the pages of your notebook, are viewed as tabs in the main body of OneNote. When viewing a section, its relative pages are listed on the right side of the program. All content is captured on pages. These pages virtually do not have an end, though by continuing with only one page you could be grouping unrelated content together.
How to create notes in OneNote 2016
Before you can get started with creating notes, you need to be able to create a notebook first. This notebook is saved locally or to your Onedrive and serves to keep all related notes together.
How to create a notebook
- Click on File.
- Click New from the left pane.
- Choose One-Drive as a save location, personal or your organization.
- Enter a name under the Notebook Name field in the Create New Notebook window.
- Click Create Notebook.
- Choose whether to share the new note with others or not.
How to open an existing notebook
- Click File.
- Click Open.
- Select Recent Notebook from Open from other locations.
- Select the location of the notebook. Recent notebooks are found in the Recent list.
- Click on the Pin icon to pin the notebook to the Recent Notebook list.
How to add and customize pages and sections in OneNote 2016
OneNote allows you to be as simple or as in-depth in your organization as possible. You could keep notes on a single, unlimited page, or keep multiple pages grouped into numerous sections.
How to add pages
- Navigate to the right pane.
- Select Add a Page at the top of the pane. The new page is listed below the command.
- Right-click the name of the page (The name is Untitled page by default).
- Select Rename from the list. The current name will be highlighted on the page section
- Enter a new name.
- Press Enter.
OneNote does allow the option to hide the page title. You only need to click on Hide Page Title command in the Page Setup group of the View tab. A warning will pop up to indicate the page title, date and time will be deleted. By clicking on Hide Page Title again, you can re-add a title. Keep in mind that you will have to re-enter the page title.
How to add color and lines to pages

- Click the View tab.
- Select Page Color from the Page Setup group.
- Choose from sixteen presented color options.
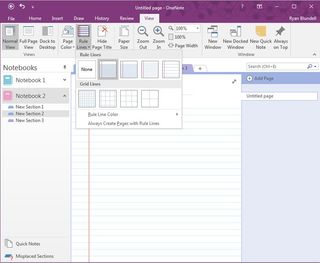
- Select Rule Lines from the Page Setup group.
- Choose from either four rule line types or four grid line types.
- Click on Rule Lines again.
- Select Rule Line Color.
- Choose a color from the drop-down list.
How to apply a template
Included with OneNote page layout options is a list of templates. They help to automatically format your pages to suit your notetaking needs. These templates are set to easily hold class notes, to-do lists or project overviews.
Get the Windows Central Newsletter
All the latest news, reviews, and guides for Windows and Xbox diehards.
- Click on the Insert tab in the navigation ribbon.
- Select Page Templates.
- Navigate to the Templates pane on the right side.
- Open one of the following template categories: Academic, Blank, Business, Decorative and Planners.
- Choose a template from the expanded category list.
Within the categories, you can choose from over one hundred included templates. If you click on Templates on Office.com, your choices number in the thousands. You can also save your own formatting as a template from the Templates page as well by clicking on Save current page as a template.
How to add a new section
As previously stated, your page length is limitless. Sections help you to keep common content filed together, much like worksheet tabs in excel. Sections can be named for easy browsing and information retrieval.
- Navigate to the Section tab below the Navigation ribbon.
- Click on the minimized tab with the plus + sign. The new tab will open, with the name selected.
- Type a name for the tab.
- Press Enter.
- Right-click on the section tab.
- Select Section Color from the list.
- Choose a color to apply.
You can change the order of your pages and sections. By dragging and dropping them elsewhere on their respective lists. Sections can be grouped together to connect related content as well as to avoid a scrolling row of tabs.
How to create a section group
Section groups are used to collect informative but no longer critical information in your Notebook. You can still access the content but it no longer clutters your row of sections. The section group icon consists of three folder tabs stacked together.

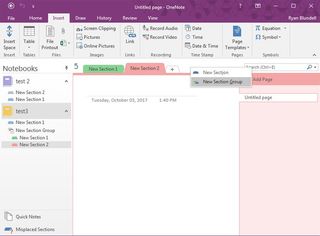
- Right-click on any section tab.
- Select New Section Group from the list.
- Enter a name in the highlighted field.
- Click and drag existing section tabs to the section group icon to add to the group.
How to enter content into OneNote 2016
Now that you have created your organizational layout, it's time to populate the content. OneNote accommodates for a wide variety of information, from simple text, to tables, to audio and video recordings. Here's a look at some of your options.
How to add text into a note
- Click on the body of the page.
- Input text. A text window will appear.
- Click on the left and right arrows located in the textbox header to resize the text box.
- Click and drag the text box around the page to rearrange.
- Double click in the text entry field to access text editing options.
- Double-click on another area of the page to create a new text box.
How to add a link

- Click anywhere on the page.
- Click on the Insert tab in the Navigation ribbon.
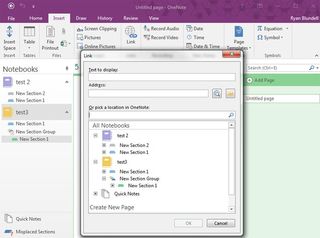
- Select Link in the Link group.
- Enter content in the Text to display field.
- Enter the site or file location in the Address field.
- Select a Onenote entry to use as an address under Or pick a location in OneNote.
- Click Ok.
How to view your OneNote history
- Click the History tab in the navigation ribbon.
- Select Recent Edits in the Authors group.
- Select from seven predetermined date ranges or choose All Pages Sorted by Date.
- Navigate to the Search Results pane.
- Choose to search within the current section, section group, the current notebook or all notebooks.
- Select from the list of previous pages in the list below.
Wrapping up
Whether you jot simple details or try to capture in-depth content, OneNote 2016 is a versatile tool that helps you capture or organize every character. Are you currently using OneNote for notetaking? What is your favorite feature? Let us know in the comments!
Microsoft Office 101: Help, how-tos and tutorials

